4 Creating Profiles
In CloudLab, a profile captures an entire cloud environment—
When you create a new profile, you are creating a new geni-lib python script, and, often, creating one or more disk images that are referenced by that script. When someone uses your profile, they will get their own experiment that boots up the resources (virtual or physical) described by the profile script.
To create profiles, you must be a registered user.
When you create a new profile, you can provide the geni-lib python script to CloudLab in one of two ways. First, you can upload it as a single file, allowing CloudLab to manage its storage, and upload a modified version or edit it in the CloudLab code editor when you want to create a new version. Second, you can use CloudLab’s repository-based profile feature, in which you provide a git repository URL containing the geni-lib python script as a profile.py file in the top-level directory of the repository. This allows you to control versioning according to your git workflow and instantiate from branches. We discuss both of these modes in more detail in the following subsections.
4.1 Creating a profile from an existing one
The easiest way to create a new profile is by copying an existing one and customizing it to your needs. Your goal should be to choose the profile that is most similar to the one you want to build. Usually, this will be one of our facility-provided profiles with a generic installation of Linux.
When you copy a profile, you are creating a new profile that is identical in every way to an existing profile. You may or may not have a running experiment using the source profile. And if you do have a running experiment, it does not impact the copy. After copying a profile, you can then modify it for your own use. And if you instantiate the copy, you can then take snapshots of disk images and use them in future version of your copy. You can copy any profile that you have access to.
4.1.1 Copying a Profile
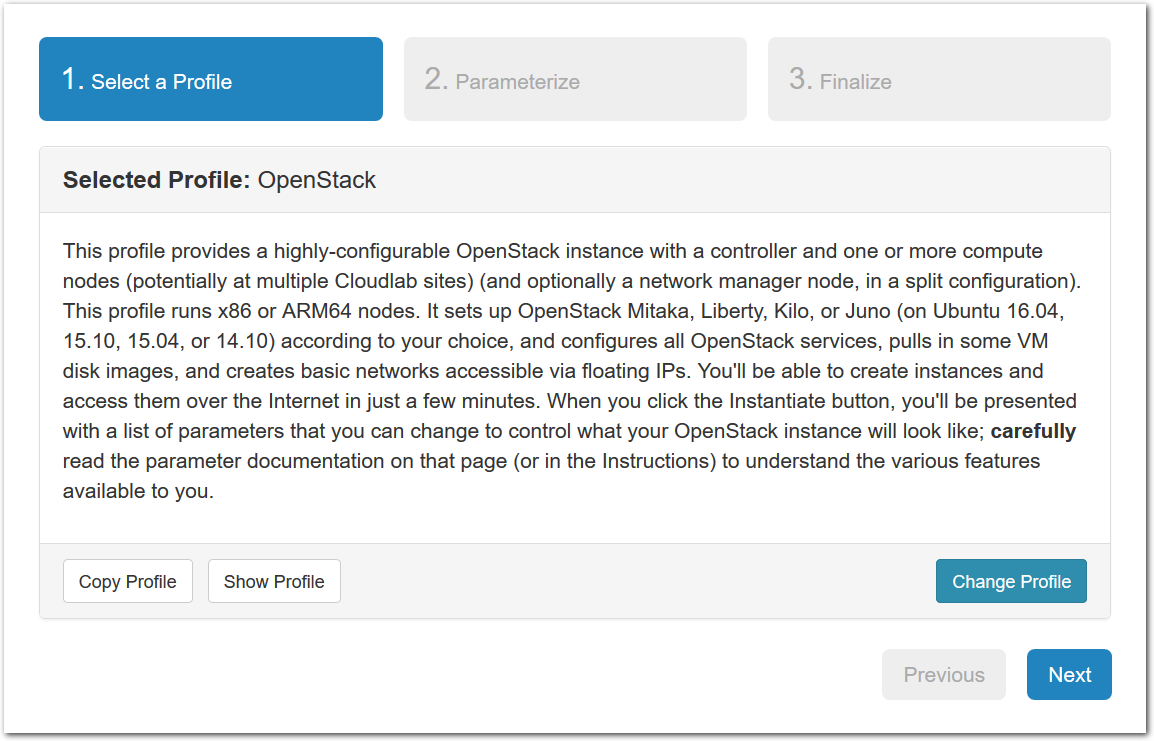
- Choose a profileFind the profile you wish to copy using the “Start Experiment” selector. Then you can click “Show Profile” button, and click the “Copy” button on the resulting page to copy the profile directly; or you can instantiate the profile if you wish to create an experiment first. Both profiles themselves and active experiments can be copied.
- Copy the profile or experimentWhile logged in, both your experiment page and the show profile page will have a copy button. Clicking this button will create a profile based on that profile or experiment.This button only copies the geni-lib python script. No state in the active experiment is preserved.
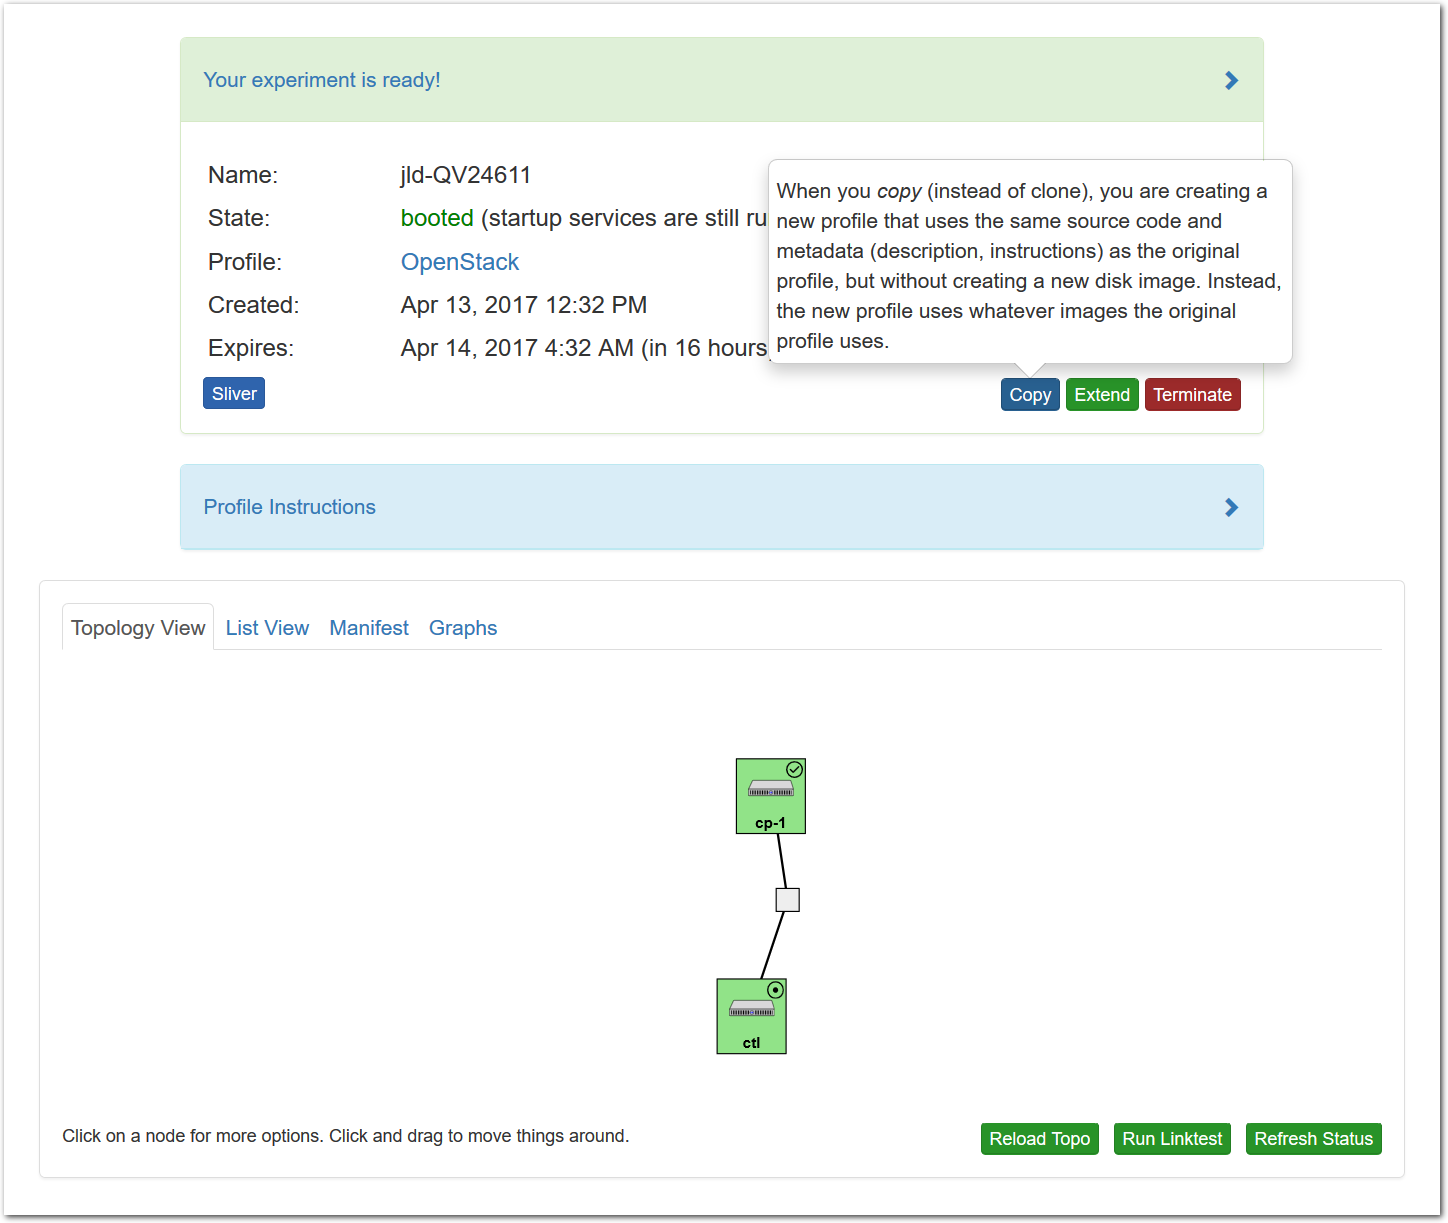
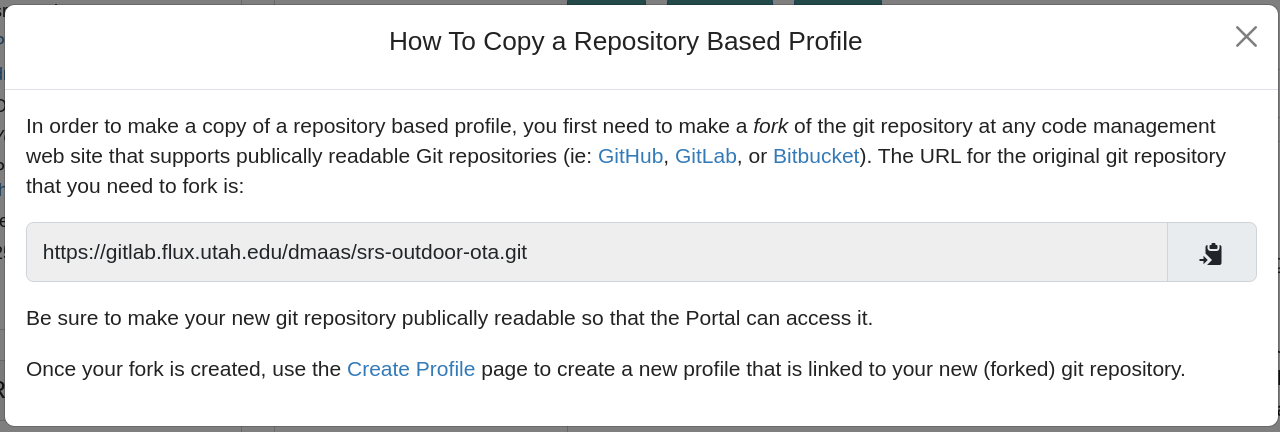
- Copying repository-based profilesNote: when you copy a repository-based profile, you will be instructed to first fork the git repository, and use that to create a new profile, as shown in the following screenshot. This is necessary because CloudLab does not act as a Git repository hosting provider, due to the potentially large size of code repositories with embedded profiles, and the fact that most repository owners prefer to store their code on Github or a private on-premises Git hosting solution.
- Create ProfileYou will be taken to a complete profile form and should fill it out as described below.
4.1.2 Creating the Profile
After copying a profile (see above) or selecting the menu option to create a new profile from scratch, you will need to fill out the profile creation form in order to complete the creation process.
- Fill out information for the new profileAfter clicking on the “Copy” button, you will see a form that allows you to view and edit the basic information associated with your profile.
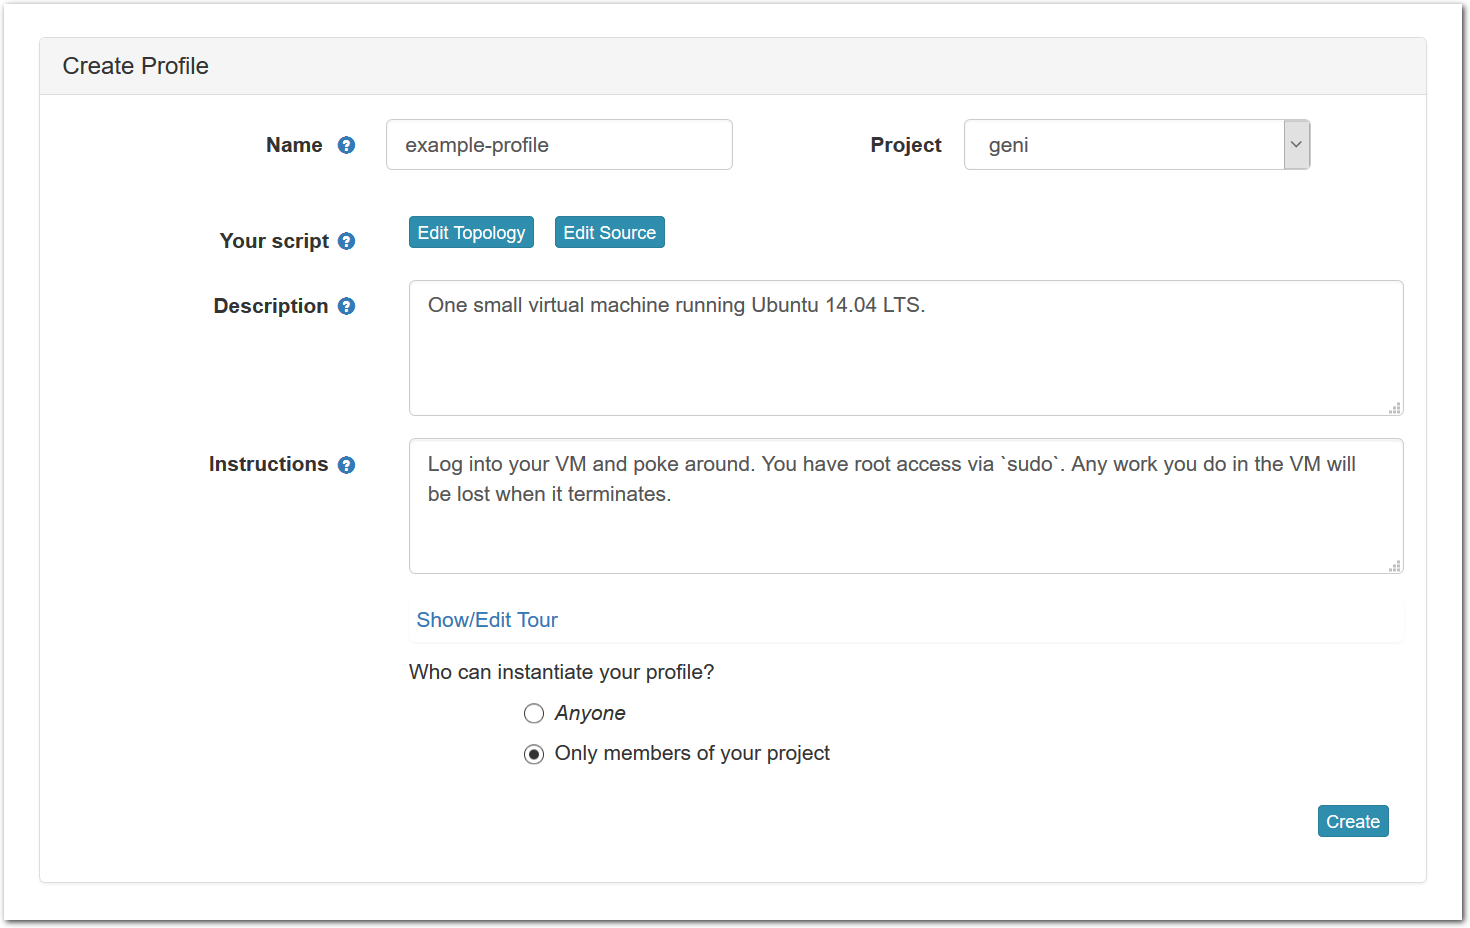 Each profile must be associated with a project. If you’re a member of more than one project, you’ll need to select which one you want the profile to belong to.Make sure to edit the profile’s Description and Instructions.The “Description” is the text that users will see when your profile is listed in CloudLab, when the user is selecting which profile to use. It is also displayed when following a direct link to your profile. It should give the reader a brief description of what they will get if they create an experiment with this profile. If the profile is associated with a paper or other publication, this is a good place to mention that. Markdown markup, including hyperlinks, are allowed in the profile description.The “Instructions” text is displayed on the experiment page after the user has created an experiment using the profile. This is a good place to tell them where the code and data can be found, what scripts they might want to run, etc. Again, Markdown is allowed.You may use template variables in your profile “Instructions” text to customize the instructions to an experiment. Currently, we support two kinds of template variables: host and password. Host variables will allow the Instructions template renderer to substitute a particular node’s FQDN—
recall that CloudLab FQDNs may be different for each experiment, since they contain both the experiment and project names as subdomains. For instance, if your profile includes a node named node-0, you could refer to its FQDN in the Instructions via {host-node-0}. You might use this to compose a URL to a service running on one of your nodes, e.g. for demos. Password variables allow you to expand specific random per-experiment passwords in the rendered instructions. If your profile includes a random password named perExptPassword, you can have it rendered in the generated Instructions via {password-perExptPassword}. The “Steps” section allows you to create a “tour” of your profile, which is displayed after a user creates an experiment with it. This feature is mostly useful if your profile contains more than one node, and you wish to explain to the user what the purpose of each node is.You have the option of making your profile usable to anyone, only registered CloudLab users, or members of your project. Regardless of the setting you chose here, CloudLab will also give you a direct link that you can use to share your profile with others of your choosing. - Test your profileIf you created your profile to capture an existing, manually configured experiment in a more reproducible manner, before terminating your experiment (or letting it expire), we strongly recommend testing out the new profile. If you elected to make it publicly visible, it will be listed in the profile selection dialog on the front page of https://www.cloudlab.us/. If not, you can instantiate it from the listing in your “My Profiles” page. If the profile will be used by guest users, we recommend testing it as one yourself: log out, and instantiate it using a different username (you will also have to use an alternate email address.)
- Share your profileNow that your profile is working, you can share it with others by sending them direct links, putting links on your webpage or in papers, etc. See “Sharing Profiles” for more details.
4.1.3 Updating a profile
You can update the metadata associated with a profile at any time by going to the “My Profiles” page and clicking on the name of the profile to go to the profile page. On this page, you can edit any of the text fields (Description, Instructions, etc.), change the permissions, etc.
If you need to update the contents of the disk image in the profile, simply create a new experiment from the profile. (You will only see this button on experiments created from profiles that you own.) Once your experiment is ready, you will see a “Create Disk Image” button on the experiment page. Log into your node, get the disk changed the way you want, and click the button. If your experiment includes multiple nodes, you will be given a dropdown to select from which node to capture the disk image. If you want to update the existing disk image the node is using, make sure to use the same name used in the profile, excluding the project name. (Note that disk images are captured into the same project in which the experiment is running.) If you use the same name, future experiments created from the profile will use the new image. However, if you want to create a new disk image, use a different disk image name, and after the image is successfully captured, edit your profile to reference the new disk image name.
As with creating a new profile, we recommend testing the profile before letting your experiment expire. If something goes wrong, we do keep one previous image file for each profile; currently, the only way to get access to this backup is to contact us.
4.2 Creating a profile with a GUI
CloudLab embeds the Jacks GUI for simple creation of small profiles. Jacks can be accessed by clicking the “topology” button on the profile creation or editing page. Jacks is designed to be simple, and to ensure that the topologies drawn can be instantiated on the hardware available. Thus, after making certain choices (such as picking an operating system image) you may find that other choices (such as the node type) become limited.
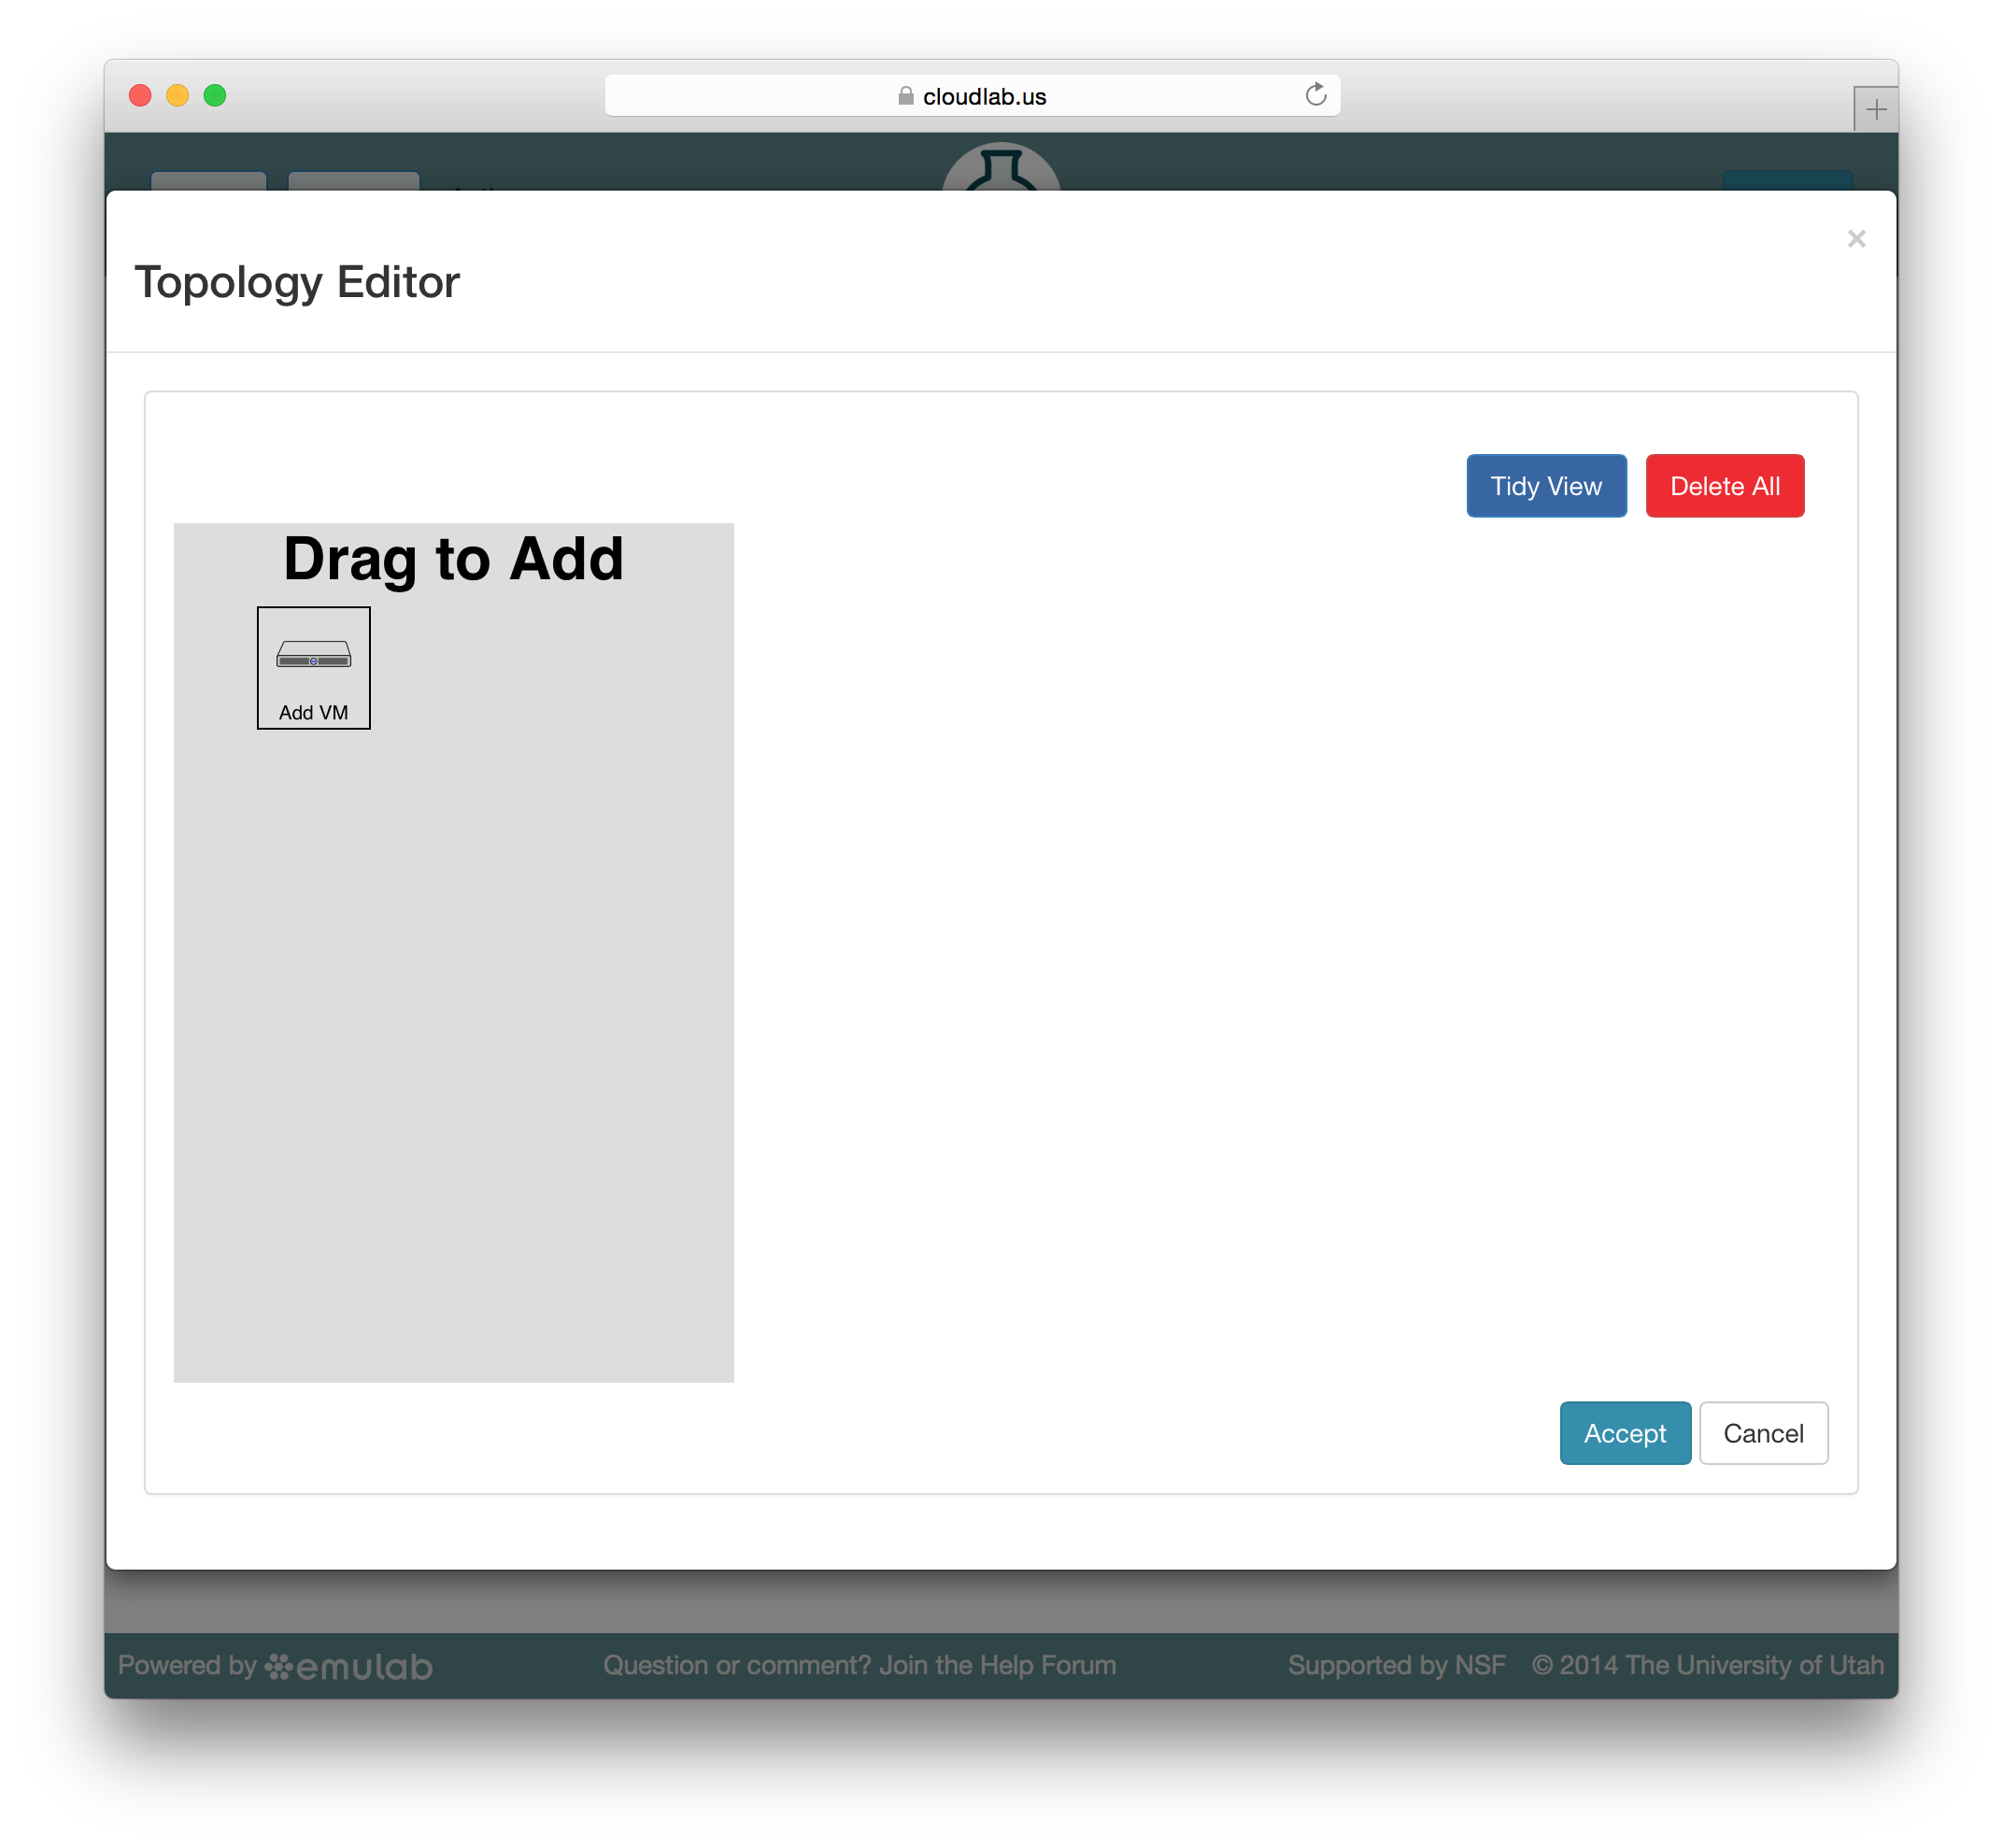
Jacks has a “palette” on the left side, giving the set of node types (such as physical or virtual machines) that are available. Dragging a node from this palette onto the larger canvas area on the right adds it to the topology. To create a link between nodes, move the mouse near the first node, and a small black line will appear. Click and drag to the second node to complete the link. To create a LAN (multi-endpoint link), create a link between two nodes, then drag links from other nodes to the small grey box that appears in the middle of the original link.
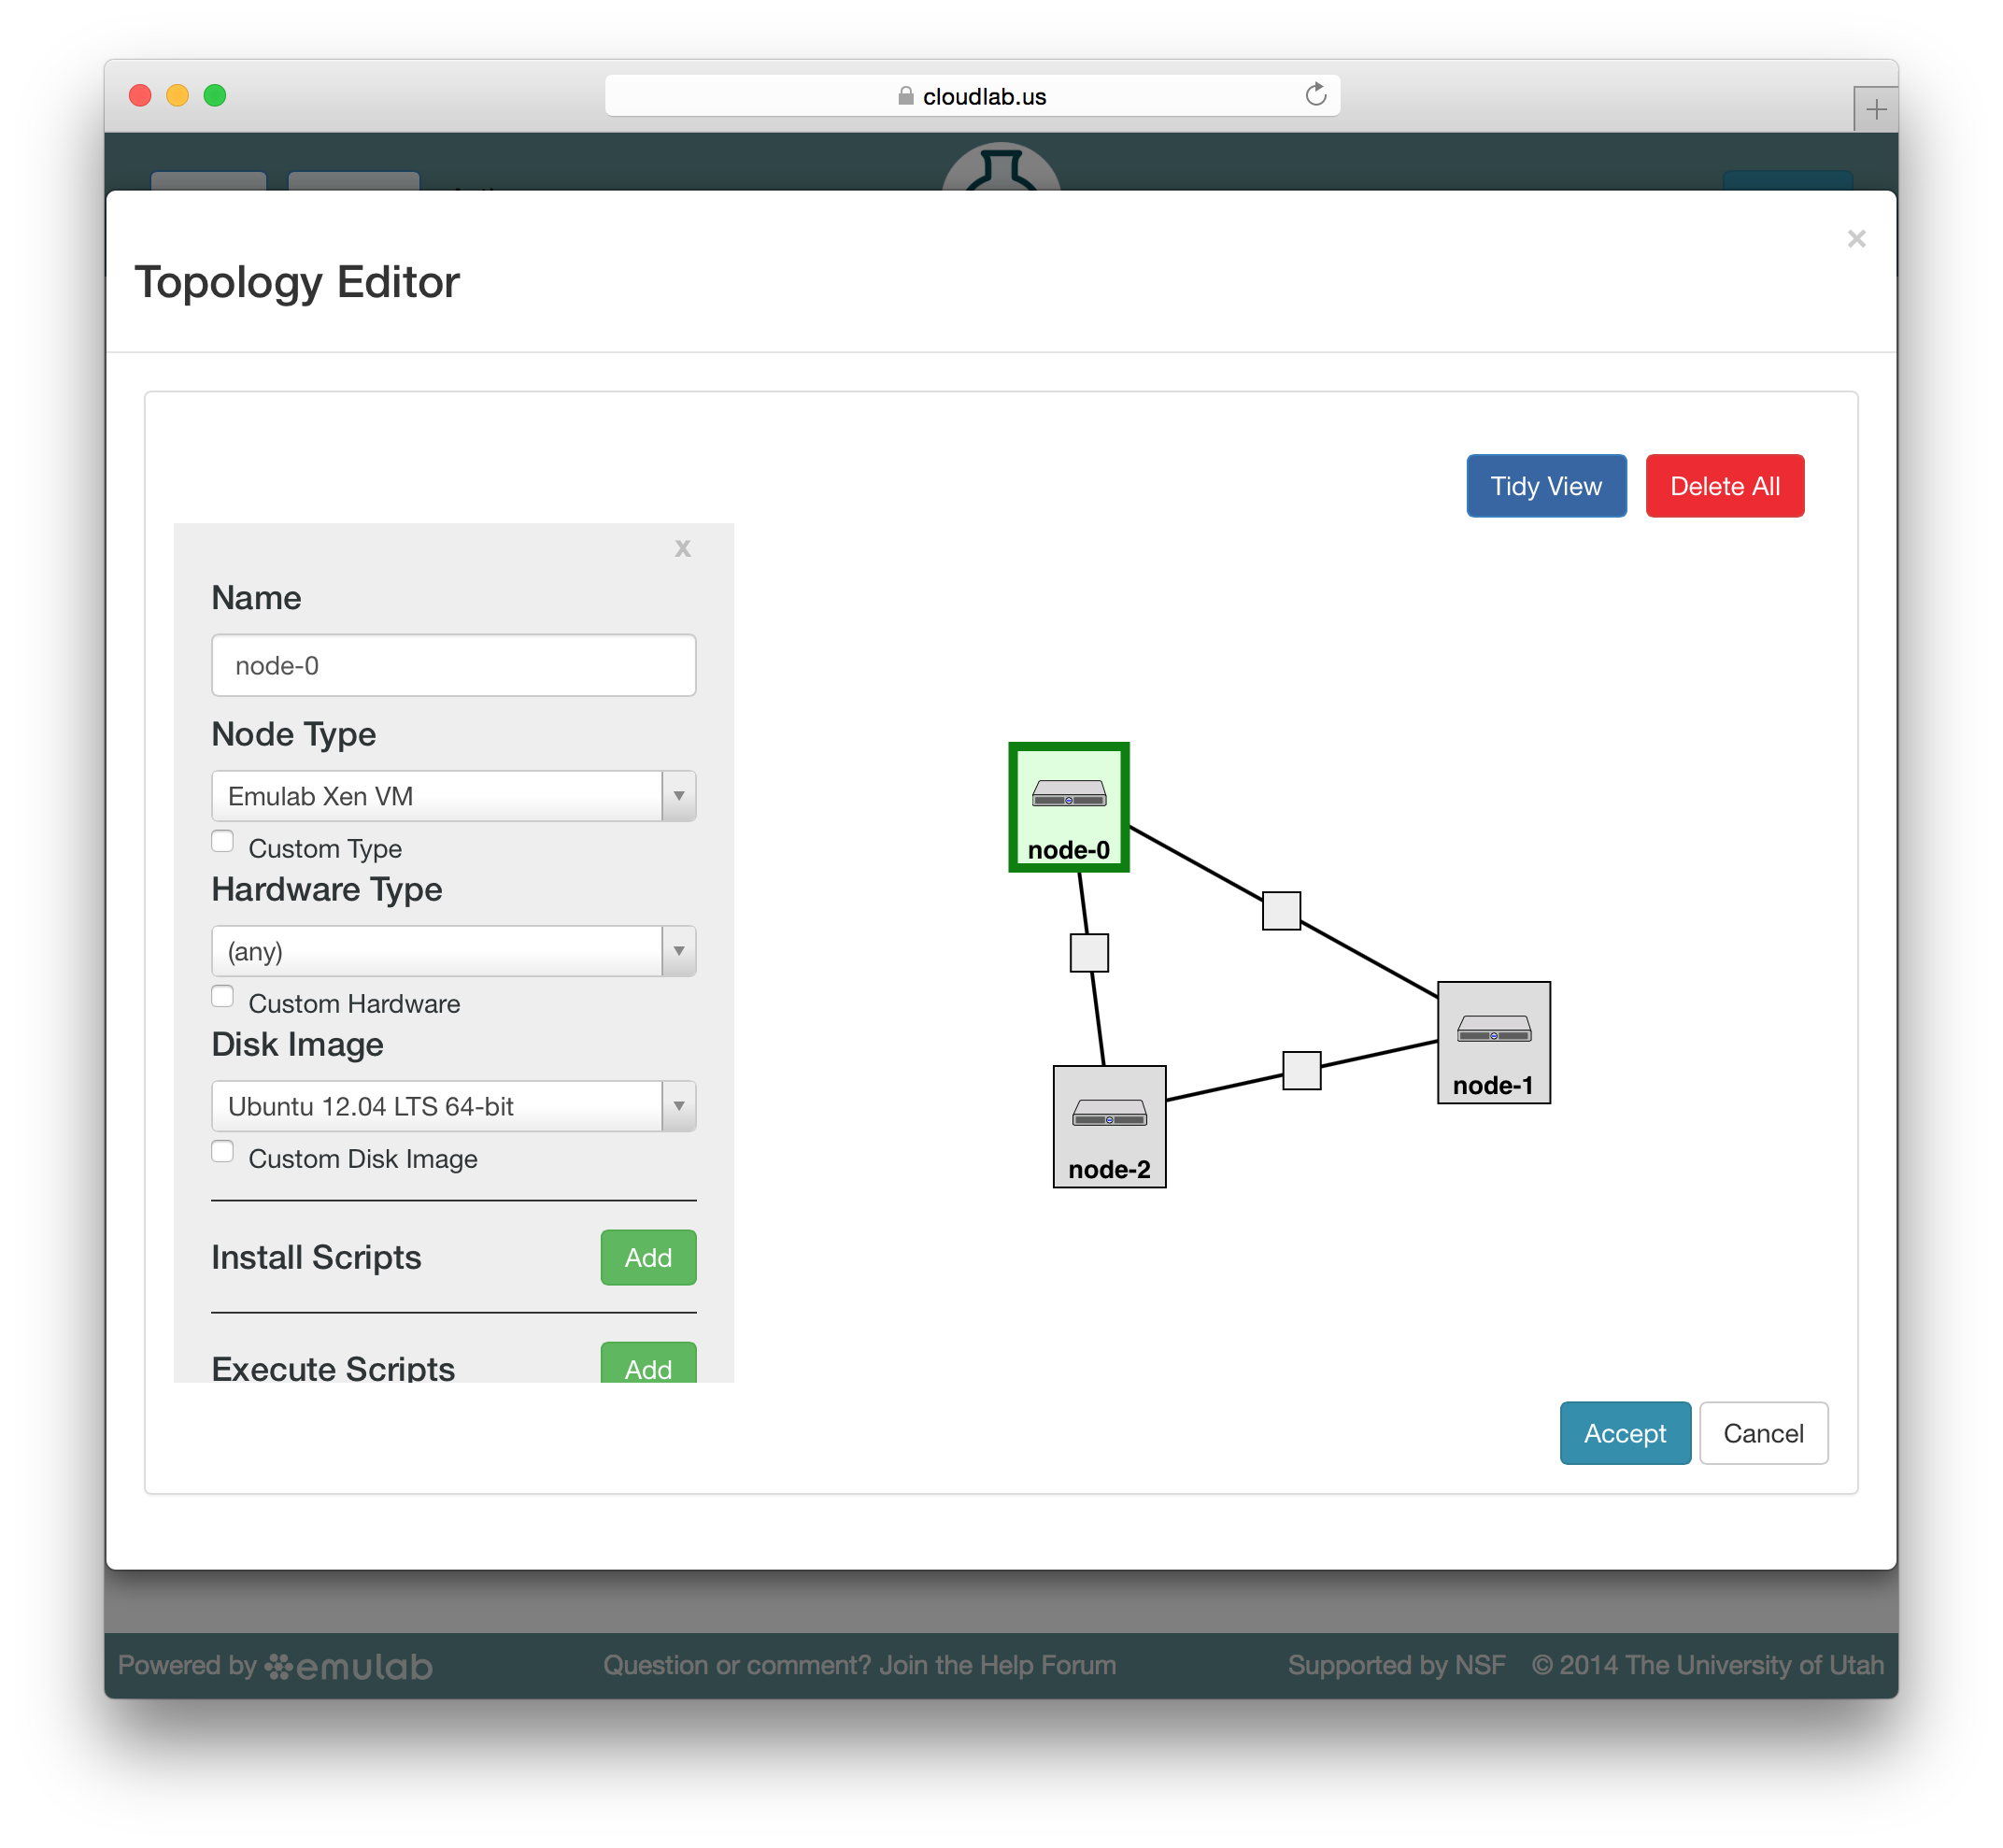
To edit the properties of a node or link, select it by clicking on its icon on the canvas. The panel on the left side will be replace by a property editor that will allow you to to set the disk image for the node, set commands to be run when the node boots, etc. To unselect the current node or link, and return to the palette on the left, simply click a blank area of the canvas.
4.3 Capturing Disk Images for Profiles
If you created a new profile by copying one of our standard or example
profiles, your profile is likely using a CloudLab-supported, standard disk
image. If you copied another user’s profile, you may instead be using a
custom disk image that the other user captured when they created their
profile. Depending on the nature of your profile, you may be satisfied to
continue using the original profile’s disk images, or you may prefer to
customize the disk images and persist changes of your own. Some profile
authors rely on CloudLab’s standard disk images, and customize these images
when the experiment boots via
startup scripts contained
in their profiles—
If you want to customize your copy of the profile and persist disk image changes, or ensure that your profile no longer depends on the disk images used in the original profile, you will want to create one or more custom disk images as used in the profile, and update the geni-lib python script in your copy of the profile to use the new image names:
- Create an experimentCreate an experiment using your copy of the original profile.
- Set up the node the way you want itLog into the node and install your software, datasets, packages, etc. Note the caveat below that any changes you make must remain outside of your home directory, and should not be tied to your user account.
- Capture a new disk imageWhile you are logged in, the experiment page for your active experiments will have a “Create Disk Image” button. Clicking this button will create a new disk image from one of the nodes in your running experiment. When customizing the image used by a profile that you do not own, you will need to create new image names, and update the geni-lib python script in your copy of the profile to use the new image names.
Capturing a disk image from an experiment can take a while, so we recommend that you extend your experiment before capturing the disk image, and contact us if you are worried your experiment might expire before you’re done creating your image. We also strongly recommend testing your profile fully before terminating the experiment you’re capturing the disk image from.
When capturing an image, your home directory is not included in the disk image snapshot! You will need to install your code and data elsewhere in the image. We recommend /local/. Keep in mind that others who use your profile are going to have their own accounts, so make sure that nothing in your image makes assumptions about the username, home directory, etc. of the user running it.
When capturing an image, be aware that only disk contents (not running process, etc.) are preserved, and as part of the creation process, your node(s) will first be rebooted in order to take consistent snapshots of the disk.
When copying a profile, remember that the disk images of a currently running experiment are not saved. If you want to customize the disk images using copy, you must copy the profile first, then instantiate your copy, then take snapshots of the modified disk image in your experiment.
4.4 Repository-Based Profiles
You can turn any public git repository (including those hosted on GitHub) into a CloudLab profile. Simply place a geni-lib script named profile.py into the top-level directory of your repository. When you create a new profile, you can provide the URL for your repository. The URL needs to be a http:// or https:// URL, and the CloudLab portal needs to be able to clone the repository without authentication.
Note that CloudLab is not a git hosting service; while we do keep a cache of your repository, we don’t guarantee that the profile will continue to work if the original repository becomes unavailable. We also have limits on the size of the repositories that we will clone.
When you instantiate a repository-based profile, the repository will be cloned into the directory /local/repository on all nodes in the experiment. This means that you can keep source code, startup scripts, etc. in your repository and reference them from profile.py. CloudLab sets the pull URL for all of these clones to be your “upstream” repository, and attempts to set a suitable push URL for (it assumes that the hosting service uses ssh for pushes, and uses the git@<hostname>:user/repo convention). As a result, git pull and git push should be connected to your repository.
There is an example repository on GitHub at https://github.com/emulab/my-profile; if you don’t already have a git repository created, a good way to get started is to fork this one and create a new profile pointing at your fork.
Pushing to your repository is still governed by the authentication and permissions of your git hosting service, so others using your profile will generally be unable to push to your repository.
4.4.1 Updating Repository-Based Profiles
By default, the CloudLab profile does not automatically update whenever you push to your upstream repository; this means that people instantiating your profile see the repository as it existed at the time CloudLab last pulled from it.
You can manually cause CloudLab to pull from your repository using the “Update” button on the profile management page.
You can also set up CloudLab to automatically pull from your repository whever it is updating. To do so, you will need to set up a “web hook” on the service that hosts your git repository. CloudLab currently supports webhooks for GitHub.com, BitBucket.org, and sites hosted using GitLab (including both GitLab.com and self-hosted GitLab installations.) See the “push URL” in the Repository Info panel on the left side of the profile page for the webhook URL, and use the “information” icon next to it to get specific instructions for setting up a webhook on each service. Once you have set the webhook up, every time you push to your repository, your hosting service will let CloudLab know that it should automatically initiate a pull. (This will not be instantaneous, but should complete quickly in most cases.)
4.4.2 Branches and Tags in Repository-Based Profiles
By default, repository-based profiles will be instantiated from the default branch of the repository; this is typically the main or master branch. At the bottom of the profile page, you will also find a list of all branches and tags in the repository, and can instantiate the version contained in any of them. Branches can be used for development work that is not yet ready to become the master (default) version of the profile, and tags can be used to mark specific versions of the profiles that were used for specific papers or course assignments, for example.
4.5 Creating a profile from scratch
CloudLab profiles are described by GENI RSpecs. You can create a profile directly from an RSpec by using the “Create Profile” option from the “Storage” menu. Note that you cannot edit the text fields until you upload an RSpec, as these fields edit (in-browser) fields in the RSpec.
4.6 Sharing Profiles
If you chose to make your profile publicly visible, it will show up in the main
“Select Profile” list on https://www.cloudlab.us/. CloudLab also gives you direct links to
your profiles so that you can share them with others, post them on your
website, publish them in papers, etc. The link can be found on the profile’s
detail page, which is linked for your “My Profiles” page. If you chose to
make your profile accessible to anyone, the link will take the form
https://www.cloudlab.us//p/<project-id>/<profile-id>. If you didn’t make the profile
public, the URL will have the form https://www.cloudlab.us//p/<UUID>, where
UUID is a 128-bit number so that the URL is not guessable. You can still
share this URLs with anyone you want to have access to the profile—
4.7 Versioned Profiles
Profiles are versioned to capture the evolution of a profile over time. When updating profiles, the result is be a new version that does not (entirely) replace the profile being updated.
When sharing a profile, you are given two links to share. One link will take the user to the most recent version of the profile that exists at the time they click the link. This is the most appropriate option in most cases. There is also a link that takes one to a specific version of the profile. This link is most useful for publication in papers or other cases in which reproducability with the exact same environment is a concnern.